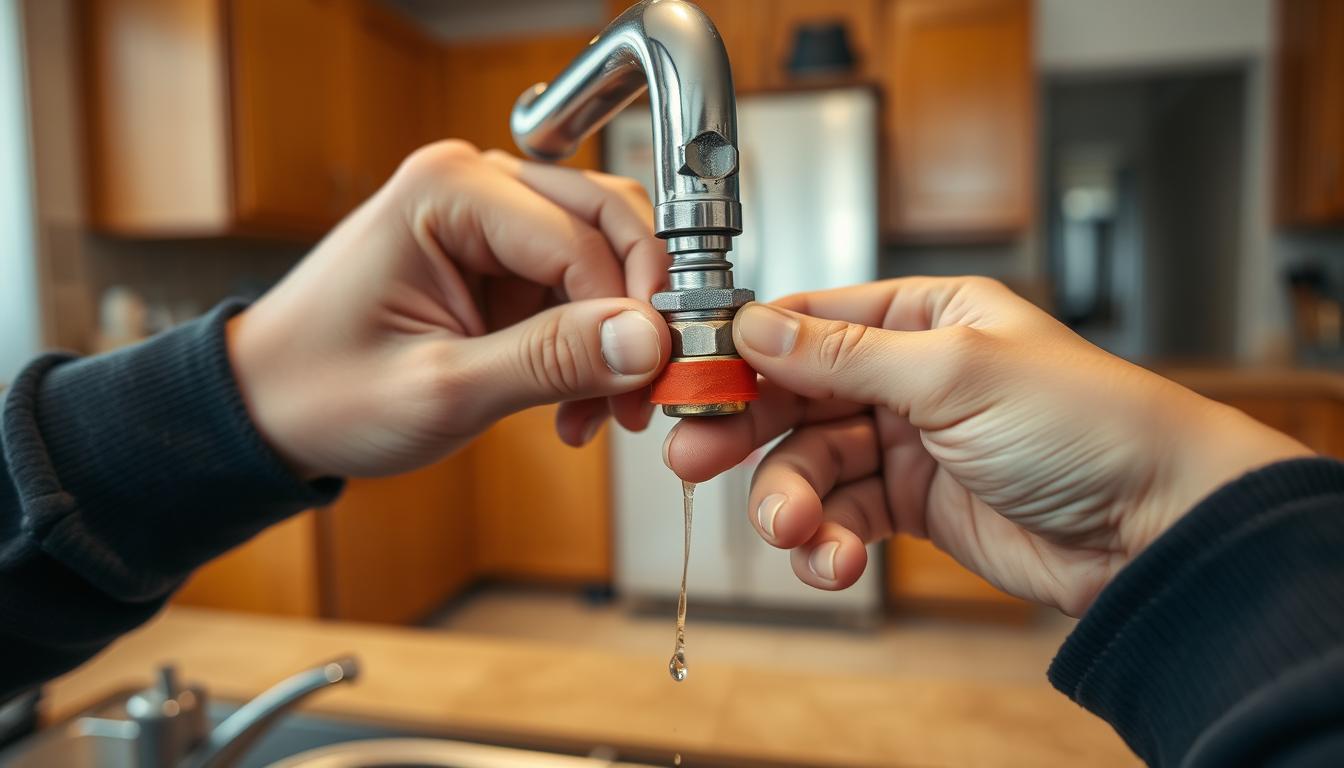
A leaking faucet can be more than just a nuisance; it’s a waste of water and a potential increase in your utility bills. The constant dripping can drive you crazy, and while calling a plumber is an option, it’s not always the most convenient or cost-effective solution.
Fortunately, there are some clever household tricks that can help you fix a leaky faucet without needing specialized tools. These DIY solutions are not only easy to implement but also effective in stopping the annoying drip. By using items you likely have at home, you can save money and feel a sense of accomplishment.
Key Takeaways
- Simple household items can be used to fix a leaky faucet.
- No specialized tools are required for these DIY solutions.
- Fixing a leaky faucet can save water and reduce utility bills.
- Clever tricks can provide a quick and effective fix.
- DIY solutions offer a cost-effective alternative to hiring a plumber.
Understanding the Annoying Drip: Why Faucets Leak
The sound of dripping water from a faucet can be irritating, but understanding its cause is the first step to a solution. A leaking faucet is not just a nuisance; it’s often a sign of wear and tear or improper installation that can lead to wasted water and higher utility bills.
Common causes of faucet leaks
Faucet leaks can stem from various issues, including worn-out washers, corroded valve seats, or loose or damaged faucet handles. Sometimes, the problem lies in the improper installation of the faucet itself. Understanding these common causes is crucial for effective DIY faucet repair.
For instance, a worn-out washer can cause water to seep through, creating that annoying drip. Similarly, corroded valve seats can prevent the faucet from closing properly, leading to leaks.
Identifying the type of leak you’re dealing with
Before you can apply a leaking faucet solution, you need to identify the type of leak. Is it a steady drip or a continuous flow? Is the leak coming from the handle or the spout? Answering these questions will help you pinpoint the faucet leak causes and choose the appropriate fix.
By understanding the nature of the leak, you can select the most effective DIY faucet repair method, whether it involves replacing a worn-out part or adjusting the faucet’s configuration.
Before You Start: Safety Precautions When Fixing a Faucet
As you prepare to silence that drip, remember that safety precautions are just as important as the repair itself. Ensuring your safety and the integrity of your sink area is crucial before diving into any DIY faucet repair.
Turning off the Water Supply
The first and most critical step is to turn off the water supply to the faucet you’re about to repair. This is usually done by locating the shut-off valves under the sink and turning them clockwise. It’s essential to test that the water supply is completely off by turning on the faucet; if water still flows, you may need to check your shut-off valves or consider turning off the main water supply to your house.
Protecting Your Sink and Surrounding Areas
Protecting your sink and the surrounding countertops from potential damage is also vital. You can achieve this by laying down a protective cloth or plastic sheet. This not only catches any drips or spills but also provides a clean surface to work on.
| Safety Precaution | Why It’s Important |
|---|---|
| Turning off water supply | Prevents water from continuing to leak or gush during repair |
| Protecting sink and countertops | Guards against damage from tools or parts |
By taking these simple precautions, you can ensure a safer and more efficient DIY faucet repair experience. Remember, safety and preparation are key to successfully fixing that annoying drip without causing further issues.
Identifying Your Faucet Type: Different Solutions for Different Designs
The first step in fixing a leaky faucet is identifying its type, as different designs require distinct repair approaches. Understanding your faucet’s design is crucial because each type has its unique characteristics and potential issues.
There are several common types of faucets, each with its own repair needs. Knowing which type you have will help you apply the most effective fix.
Compression Faucets
Compression faucets are one of the most common types and feature separate handles for hot and cold water. They work by compressing a rubber washer against a valve seat to stop water flow. Leaks often occur when the washer or valve seat becomes worn.
- Typically have separate handles for hot and cold water
- Use a compression mechanism to control water flow
- Often require replacement of worn-out washers or valve seats
Ball-Type Faucets
Ball-type faucets use a single handle to control both water temperature and flow rate. They contain a ball that rotates within a socket, controlling water flow. Leaks can occur if the seals or springs within the faucet become worn.
Key characteristics include:
- Single-handle control
- Ball-and-socket mechanism
- Potential for leaks around the seals or springs
Cartridge Faucets
Cartridge faucets also use a single handle and contain a cartridge that controls water flow. Leaks often result from worn-out or damaged cartridges.
Notable features:
- Single-handle operation
- Cartridge mechanism for controlling water
- Often require cartridge replacement to fix leaks
Ceramic Disk Faucets
Ceramic disk faucets use two ceramic disks to control water flow and temperature. They are known for their durability and are less prone to leaks, but when leaks do occur, it’s often due to debris or mineral buildup between the disks.
Key aspects include:
- High durability
- Ceramic disk mechanism
- Less prone to leaks, but may require cleaning to resolve issues
By identifying your faucet type, you can choose the most appropriate repair method, saving time and potentially avoiding the need for professional help.
The Vinegar Miracle: Using Household Vinegar to Fix Mineral Buildup
Vinegar, a staple in many kitchens, can be used to dissolve mineral buildup and fix leaky faucets. Mineral deposits often cause faucets to leak, and using vinegar is a simple, non-toxic way to address this issue.
How Vinegar Dissolves Mineral Deposits
Mineral buildup occurs when water with high mineral content evaporates, leaving behind deposits like calcium and lime. Vinegar’s acidity helps break down these deposits, making it easier to fix leaks. The acetic acid in vinegar reacts with mineral deposits, dissolving them and clearing the way for proper faucet function.
Step-by-Step Vinegar Soak Method
To use vinegar for faucet repair, follow these steps:
Preparing Your Vinegar Solution
Mix equal parts of water and white vinegar in a container large enough to submerge the faucet’s aerator or other affected parts. For more severe buildup, you can use undiluted vinegar.
Application Techniques for Different Faucet Parts
For faucets with removable aerators, soak them in the vinegar solution for a few hours or overnight. For other parts, you can wrap a cloth soaked in vinegar around the area.
“Soaking the aerator in vinegar overnight worked wonders for my faucet. It was like new again!”
After soaking, rinse the parts thoroughly with water and reassemble the faucet. This method is effective for mineral buildup removal and can help restore your faucet’s original performance.
Using vinegar for faucet repair is a cost-effective and eco-friendly solution. It’s a great example of how household items can be repurposed for DIY fixes.
Rubber Band Tricks: Creating Temporary Seals Without Tools
Fixing a leaky faucet doesn’t always require specialized tools; sometimes, a simple rubber band can be a temporary solution. This method is particularly useful when you’re in a pinch and need to stop the leak quickly.
Using Rubber Bands to Reinforce Leaky Joints
Rubber bands can serve as a makeshift sealant for leaky joints in your faucet. To do this, simply wrap a rubber band around the leaky area a few times. The rubber band acts as a gasket, creating a tighter seal that can temporarily stop the leak.
When This Method Works Best
This rubber band fix works best for minor leaks and when the faucet isn’t severely damaged. It’s a great temporary solution until you can get the proper repair tools or call a professional.
Selecting the Right Rubber Band Thickness
The effectiveness of this fix largely depends on selecting the right thickness of the rubber band. A thicker rubber band is generally more effective for larger leaks, while a thinner one might suffice for smaller drips. Here are some tips for choosing the right rubber band:
- Choose a rubber band that fits snugly around the faucet joint.
- Opt for a rubber band with good elasticity to ensure a tight seal.
- If the leak is significant, consider layering multiple rubber bands for a better seal.
By using a rubber band, you can achieve atemporary faucet sealthat’s effective until you can implement a more permanent fix.
Dental Floss and Thread: Makeshift Washers for Emergency Repairs
Dental floss, a common household item, can be repurposed as a makeshift washer in emergency faucet repairs. This unconventional use can provide a temporary solution to a leaky faucet when you’re without your toolbox.
Creating Temporary Washers from Household Items
To create a makeshift washer, you’ll need some dental floss or thread. The process involves wrapping the floss around the faucet’s stem or the leaking area to create a seal. This method is particularly useful for small leaks where a proper washer is not available.
Installation Techniques Without Tools
Installation is relatively straightforward. Simply wrap the dental floss around the designated area, ensuring it’s snug but not overly tight. For compression faucets, this might mean wrapping it around the stem before replacing the handle. The key is to create a tight seal that prevents water from escaping.
Waxed vs. Unwaxed Floss: Which Works Better
The choice between waxed and unwaxed floss can affect the outcome. Waxed floss might provide a better seal due to its wax coating, which can help it stick together and form a tighter seal. However, unwaxed floss can still be effective, especially if you’re dealing with a very small leak. Experimenting with both types can help you determine which works best for your specific situation.
Baking Soda Solutions: Clearing Clogs and Fixing Minor Leaks
Baking soda’s versatility extends beyond the kitchen; it’s also effective in clearing clogs and fixing minor faucet leaks. This common household item can be a powerful ally in DIY faucet repairs, offering an eco-friendly and cost-effective solution.
Baking Soda and Vinegar Combinations
One of the most effective ways to use baking soda for faucet repairs is by combining it with vinegar. The mixture creates a chemical reaction that can help dissolve mineral deposits and clear clogs. To use this method, mix equal parts of baking soda and vinegar to form a paste.
As one plumbing expert notes, “The combination of baking soda and vinegar is a powerful tool in clearing clogs without the need for harsh chemicals.”
Application Methods for Different Faucet Problems
The baking soda and vinegar paste can be applied to different parts of the faucet to address various issues. For example, it can be used to clear clogs in the aerator or to fix minor leaks around the faucet’s joints.
Creating the Perfect Paste Consistency
To achieve the perfect paste consistency, it’s essential to mix the baking soda and vinegar in the right proportions. Start with a small amount of vinegar and gradually add it to the baking soda until you achieve a thick but still pourable paste.
Tip: The paste should be thick enough to stick to the area you’re treating but still be easy to pour or apply with a brush.
By using baking soda solutions, homeowners can effectively clear clogs and fix minor leaks without resorting to expensive plumbing tools or chemicals, making it a valuable DIY solution for faucet repairs.
Silicone Solutions: Using Household Sealants for Temporary Fixes
Silicone sealants, commonly found in many households, can offer a temporary reprieve from the annoyance of a dripping faucet. These versatile products are typically used for sealing gaps and joints in bathrooms and kitchens, but they can also be repurposed for faucet repairs in a pinch.
Common Household Silicone Products
Before you can apply a silicone solution to your leaky faucet, you need to identify if you have any suitable products at home. Silicone caulk or silicone sealant tubes are commonly used for bathroom and kitchen repairs. Check your storage or maintenance supplies for these products, which usually come in tubes or caulk guns.
Some common household items that contain silicone include:
- Silicone caulk for bathrooms and kitchens
- Aquarium sealants
- Certain types of adhesives
Application Techniques Without Specialized Tools
Applying silicone sealant to fix a leaky faucet requires some care but doesn’t necessarily need specialized tools. Here’s a basic method:
- Clean the area around the leak thoroughly.
- Dry the area completely.
- Apply a small amount of silicone sealant to the leaky area.
- Smooth out the sealant with a damp finger or a credit card.
Drying Time and Water Exposure Considerations
It’s crucial to consider the drying time of the silicone sealant before exposing it to water. Most silicone sealants take between 24 to 48 hours to fully cure, depending on the product and environmental conditions. Avoid using the faucet until the sealant is fully dry to ensure its effectiveness.
By understanding how to use silicone sealants effectively, you can temporarily fix a leaky faucet until a more permanent solution can be implemented. This approach can help reduce water waste and alleviate the annoyance of a constant drip.
Plumber’s Tape Alternatives: Household Items That Work Similarly
You don’t always need specialized tools like plumber’s tape to fix a leaky faucet; some common household items can serve as effective alternatives. When faced with a dripping faucet and no plumber’s tape in sight, don’t worry – there are several creative solutions you can try using items you likely have at home.
Wax Paper and Other Surprising Substitutes
One of the most surprising substitutes for plumber’s tape is wax paper. Its waxy coating can provide a temporary seal around threaded connections, helping to stop leaks. Other household items that can be repurposed for this task include:
- Teflon tape (if you have it for other uses)
- Thread sealant paste
- Even certain types of fabric or cloth can be used in a pinch
Application Techniques Without Traditional Tools
Applying these alternatives requires some finesse, but it’s relatively straightforward. For wax paper, simply wrap it around the threaded area before screwing the parts together. Ensure it’s snug and evenly spread to create an effective seal. For other materials like thread sealant paste, apply a small amount to the threads and assemble the faucet parts as usual.
Creating Layered Seals for Better Results
For a more durable seal, consider creating layered seals. This involves applying one type of sealant or tape, then adding another layer on top. For example, you could use a thin layer of thread sealant paste followed by a wrap of wax paper. This combination can provide a surprisingly effective temporary fix until you can get proper plumber’s tape.

While these alternatives can be lifesavers in a pinch, it’s worth noting that they are generally temporary solutions. For a permanent fix, it’s still best to use proper plumber’s tape or consult a professional if the leak persists.
Hot Water Flush Method: Dissolving Minor Blockages
For faucets plagued by minor clogs, a hot water treatment can be a surprisingly effective solution. Minor blockages can cause leaks and drips, but in many cases, they can be cleared without the need for specialized tools.
When and How to Use Hot Water Treatments
The hot water flush method involves running hot water through the faucet to dissolve any mineral deposits or debris that might be causing the leak. This method is particularly effective for faucets with aerators or small passageways where debris tends to accumulate.
To apply this method, simply turn your faucet to its hottest setting and let it run for a few minutes. The hot water can help dissolve any buildup, potentially clearing the blockage and stopping the leak.
Combining with Other Household Solutions
For more stubborn blockages, combining the hot water flush with other household solutions can enhance its effectiveness. For instance, using baking soda and vinegar before a hot water flush can help break down tougher mineral deposits.
Temperature Considerations for Different Faucet Materials
It’s crucial to consider the material of your faucet when using the hot water flush method. For faucets with rubber or plastic parts, extremely hot water might cause damage. In such cases, using warm water instead of boiling water can be a safer option.
| Faucet Material | Recommended Water Temperature |
|---|---|
| Metal Faucets | Hot Water |
| Faucets with Rubber/Plastic Parts | Warm Water |
As plumber John Smith once said, “Sometimes, the simplest solutions are the most effective. A hot water flush can be just what you need to get your faucet working properly again.”
“The key to fixing a leaky faucet often lies in understanding the cause of the leak and applying the right fix.”
Petroleum Jelly: The Secret Weapon for Temporary Leak Fixes
Leaky faucets can be a nuisance, but there’s a simple, temporary solution you might not have considered: petroleum jelly. This common household item can be used to create a water-resistant seal on certain faucet parts, providing a quick fix until a more permanent solution can be implemented.
Using Vaseline to Create Water-Resistant Seals
Petroleum jelly, commonly known by the brand name Vaseline, can be applied to various faucet parts to temporarily stop or reduce leaks. The idea is to use the jelly to create a seal around worn-out or damaged areas. For instance, applying a small amount around the stem or O-ring of a faucet can help prevent water from escaping.
Application Techniques for Different Faucet Parts
The application of petroleum jelly can vary depending on the faucet type and the location of the leak. For compression faucets, applying petroleum jelly to the stem or O-ring can be effective. For other types, such as cartridge or ball-type faucets, the jelly can be used around the seals or gaskets. It’s essential to clean the area before applying the jelly to ensure it adheres properly.
How Long Petroleum Jelly Fixes Typically Last
The duration for which a petroleum jelly fix lasts can vary significantly based on water pressure, the severity of the leak, and the type of faucet. Generally, this method is best used as a short-term solution until a more permanent repair can be made. Here’s a rough estimate of what you might expect:
| Faucet Type | Expected Duration of Fix |
|---|---|
| Compression Faucet | Several days to a week |
| Cartridge Faucet | A few days |
| Ball-Type Faucet | Until next use, potentially longer |
As one plumbing expert notes, “While petroleum jelly can provide a temporary solution, it’s crucial to address the root cause of the leak to prevent further issues.” This temporary fix can be particularly useful in emergency situations or when waiting for a professional plumber.
“Petroleum jelly can be a lifesaver in a pinch, but it’s not a substitute for proper plumbing maintenance.”
DIY Faucet Tightening: Using Household Items as Makeshift Wrenches
You don’t need a toolbox to tighten your faucet; clever use of household items can get the job done. Sometimes, the solution to a leaky faucet is simpler than you think, requiring not a trip to the hardware store, but a look around your own home.
Rubber Grip Pads from Kitchen Drawers
Rubber grip pads, commonly found in kitchen drawers, can serve as excellent makeshift grip enhancers. By providing extra friction, they can help you tighten loose faucet parts without stripping them. To use, simply place a rubber pad between your hand and the faucet part you need to tighten, and turn.
Using Coins and Other Flat Objects for Leverage
Coins or other flat, sturdy objects can be used to gain the leverage needed to tighten certain faucet parts. For instance, a coin can be used to turn a small valve or fitting when a wrench is not available. Be cautious not to damage the faucet finish.
Creating Compound Tools from Multiple Household Items
For more stubborn parts, you might need to create a compound tool. This can be achieved by combining items like pliers with rubber grips or using a cloth to prevent scratching. The key is to improvise with what you have on hand.
Some effective DIY faucet tightening methods include:
- Using rubber grip pads for extra friction
- Employing coins or flat objects for leverage
- Creating compound tools from household items

By utilizing these household items as makeshift wrenches, you can effectively tighten your faucet without needing to purchase specialized tools. This not only saves you money but also gives you a sense of accomplishment in solving a common household problem.
Preventing Future Leaks: Maintenance Tips Using Everyday Items
Simple household items can be used to maintain your faucet and prevent leaks, making it a cost-effective solution. Regular maintenance not only saves water but also prolongs the lifespan of your faucet.
Regular cleaning routines to prevent mineral buildup
To prevent mineral buildup, regularly clean your faucet’s aerator using a mixture of vinegar and water. Soak the aerator in the solution for about 30 minutes, then scrub it gently with a soft-bristled toothbrush. This simple routine can significantly reduce the risk of leaks.
Early warning signs of potential leaks
Be aware of early warning signs such as a slight drip or a change in water pressure. These signs indicate that your faucet needs attention. Using a dry cloth, regularly wipe down the faucet to check for any signs of moisture or mineral deposits.
Seasonal maintenance considerations
During winter months, insulate exposed pipes to prevent freezing. In areas with hard water, more frequent cleaning may be necessary to prevent mineral buildup. By adapting your maintenance routine to the season, you can further protect your faucet.
When to Give Up: Signs You Need Professional Help Despite These Tricks
While DIY tricks can fix many faucet leaks, there are times when calling a professional plumber is the best course of action. It’s essential to recognize the signs that indicate a more serious plumbing issue that requires expert attention.
Recognizing serious plumbing issues
Some leaks are symptoms of more significant problems, such as corroded pipes, faulty faucet installations, or issues with the water pressure. If you notice any of the following, it may be time to call a plumber:
- Multiple leaks or drips from different faucets
- Water damage or mineral deposits around the leak
- A significant increase in your water bill
- Leaks that persist or worsen despite DIY repairs
Cost-benefit analysis of DIY vs. professional repair
When deciding between a DIY repair and hiring a professional, consider the cost implications and potential outcomes. The following table summarizes key factors to consider:
| Factor | DIY Repair | Professional Repair |
|---|---|---|
| Cost | Low (using household items) | Higher (labor and parts) |
| Expertise | Dependent on personal skill | High (professional training) |
| Guarantee | No guarantee | Typically includes warranty |
| Time | Variable (trial and error) | Efficient (experienced) |
Finding affordable plumbing help when needed
If you’ve decided to seek professional help, it’s crucial to find a plumber who offers quality services at an affordable price. Look for licensed plumbers with good reviews and consider getting multiple quotes before making a decision. Using online platforms or asking for referrals from friends and family can help you find a reliable and affordable plumber.
Conclusion: Silence That Drip and Save Money With Household Ingenuity
By using clever household tricks, you can silence that annoying drip and save money on your water bill. The various DIY solutions presented in this article, from using vinegar to dissolve mineral buildup to employing rubber bands as temporary seals, offer effective ways to fix leaky faucets without calling a plumber.
By applying these household ingenuity methods, you can tackle common faucet problems, such as leaky joints and clogged aerators, using items you likely have at home. This approach not only saves you money on plumbing costs but also helps conserve water and reduce waste.
With a little creativity and resourcefulness, you can become your own handyman and fix that leaky faucet, enjoying the satisfaction of a job well done while keeping your household expenses in check.