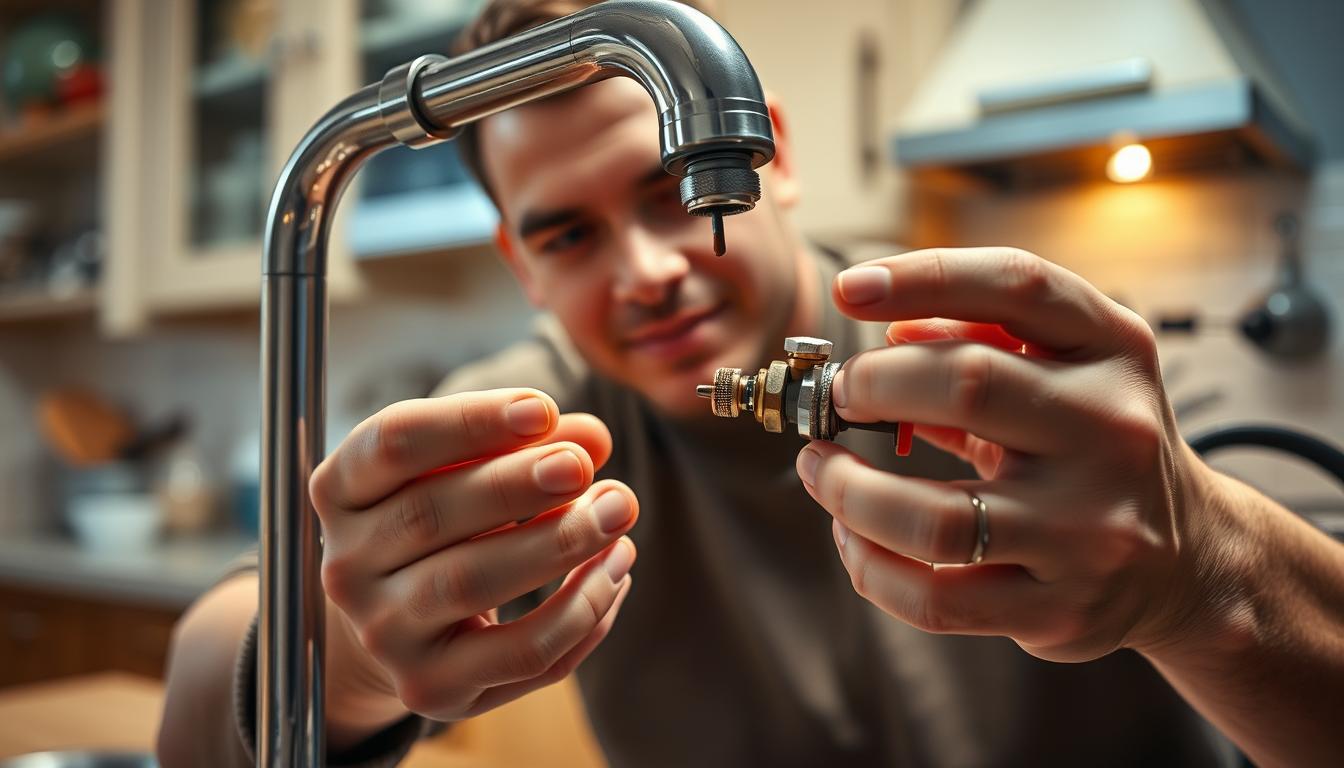
A leaking faucet can be more than just a nuisance; it can lead to significant water damage and increased utility bills if not addressed promptly. The good news is that you don’t necessarily need specialized tools to fix the issue.
Fixing a leaking faucet without tools is a feasible task that can save you money and prevent further damage to your home. By following a few simple steps, you can DIY faucet fix and stop the leak.
Understanding how to repair a leaking faucet is essential for homeowners. Not only does it help in conserving water, but it also prevents potential water damage that could lead to costly repairs.
Key Takeaways
- Learn how to identify the source of the leak in your faucet.
- Understand the simple steps to fix a leaking faucet without tools.
- Discover the benefits of promptly repairing a leaking faucet.
- Explore DIY methods for faucet repair.
- Prevent water damage and save on utility bills.
The Hidden Dangers of Ignoring a Leaking Faucet
A leaking faucet is more than just a nuisance; it’s a warning sign of potential disasters waiting to happen. Ignoring this issue can lead to significant problems that affect both your home and your wallet.
Water Damage to Cabinets and Flooring
Continuous dripping from a leaking faucet can cause substantial water damage to your cabinets and flooring. The persistent moisture can weaken the structural integrity of these components, leading to costly repairs or replacements. For instance, water can seep into the wooden cabinets, causing them to rot or warp, and damage the flooring, whether it’s hardwood, laminate, or tile.
Increased Water Bills from Even Small Drips
Even a small drip from a leaking faucet can result in a significant increase in your water bills over time. According to the United States Environmental Protection Agency (EPA), a single drip per second can waste over 3,000 gallons of water per year. This not only wastes a precious resource but also increases your utility costs unnecessarily.
“A single drip per second can waste over 3,000 gallons of water per year.” – United States Environmental Protection Agency
Mold and Mildew Growth from Persistent Moisture
Leaking faucets create an ideal environment for mold and mildew growth due to the persistent moisture. This can lead to health issues, especially for individuals with respiratory problems or allergies. The mold can spread beyond the immediate area around the faucet, affecting other parts of your home.
| Danger | Consequence |
|---|---|
| Water Damage | Costly repairs or replacements of cabinets and flooring |
| Increased Water Bills | Higher utility costs due to wasted water |
| Mold and Mildew Growth | Health issues and potential spread to other areas |
Addressing a leaking faucet promptly is crucial to prevent these hidden dangers from becoming major issues. By taking action early, you can save money, protect your home, and maintain a healthy living environment.
Identifying Your Faucet Type Before Attempting Repairs
Knowing the type of faucet you have is crucial for a successful DIY repair. Different faucets have distinct mechanisms, and understanding these differences is key to fixing leaks effectively.
Compression Faucets (Two Handles)
Compression faucets are one of the most common types and are characterized by their two-handle design. They work by compressing a rubber washer against a valve seat to stop water flow. Over time, these washers wear out, causing leaks.
Ball-Type Faucets (Single Handle)
Ball-type faucets, also known as single-handle faucets, control water temperature and flow with a rotating ball. They are known for their simplicity but can be prone to leaks around the ball and spring mechanism.
Cartridge Faucets (Smooth Operation)
Cartridge faucets are recognized for their smooth operation and are often found in modern kitchens. They use a cartridge to control water flow and temperature, making them relatively easy to repair.
Ceramic Disk Faucets (Solid Feel)
Ceramic disk faucets are known for their durability and solid feel when operating. They use ceramic disks to control water flow, providing a leak-resistant performance when properly maintained.
Visual Identification Guide
To identify your faucet type visually, look for the number of handles and the overall design. Compression faucets have two handles, while ball-type, cartridge, and ceramic disk faucets typically have one handle.
| Faucet Type | Handles | Key Characteristics |
|---|---|---|
| Compression | Two | Uses rubber washers, prone to wear and tear |
| Ball-Type | Single | Rotating ball, simple mechanism |
| Cartridge | Single | Smooth operation, cartridge control |
| Ceramic Disk | Single | Durable, ceramic disks for control |
Age-Based Identification Tips
The age of your faucet can also provide clues about its type. Older homes often have compression faucets, while newer homes may feature more modern designs like cartridge or ceramic disk faucets.
Common Causes Behind Persistent Faucet Drips
The persistent drip from a faucet is usually a symptom of an underlying problem that needs to be addressed. Faucet leaks can stem from various issues, and understanding these causes is crucial for effective repairs.
Worn-Out O-Rings and Rubber Washers
O-rings and rubber washers are crucial components that help seal faucet parts. Over time, they can wear out, leading to leaks. Signs of worn-out O-rings include drips from the faucet’s handle or spout. Replacing these parts is often straightforward and can be done without specialized tools.
Corroded Valve Seats and Connections
Corrosion can occur on valve seats and connections due to water exposure, leading to leaks. Corrosion signs include visible rust or mineral deposits around the affected areas. While corrosion can be challenging to address without tools, some cases may be temporarily mitigated by cleaning or adjusting the corroded parts.
Loose Parts That Need Tightening
Loose parts are a common cause of faucet leaks. Over time, the connections within a faucet can loosen due to use, leading to drips. Tightening these loose parts can often resolve the issue without needing any tools, or sometimes just using basic household items.
Mineral Buildup From Hard Water
Mineral buildup is another significant cause of faucet leaks, especially in areas with hard water. Minerals can accumulate on faucet parts, causing them to malfunction. Signs of mineral buildup include stiff faucet handles or visible mineral deposits.
Signs of Each Problem
Identifying the signs of each issue is key to addressing faucet leaks. For worn-out O-rings, look for drips around handles or spouts. Corrosion is often visible as rust or mineral deposits. Loose parts may cause audible dripping or visible movement in faucet components. Mineral buildup can cause stiffness in faucet operation or visible scaling.
Which Problems Can Be Fixed Without Tools
Some issues, like tightening loose parts or realigning slightly misplaced components, can often be fixed without tools. However, problems like corroded parts or significant mineral buildup may require more intervention, potentially needing specialized tools or professional assistance.
Essential Preparations to Make Repairs Easier
To fix a leaking faucet efficiently, several preparatory steps can make a significant difference. Proper preparation not only simplifies the repair process but also helps in avoiding further damage to the faucet and surrounding areas.
Properly Shutting Off Water Supply Valves
The first step in preparing for faucet repair is to shut off the water supply. Locate the shut-off valves under the sink and turn them clockwise to stop the water flow. It’s essential to test the water supply by turning on the faucet to ensure the valves are completely closed.
Protecting Your Sink and Drain From Parts
To prevent losing small parts during the repair, protect your sink and drain. Using a cloth or towel to cover the drain can catch any falling parts, making the process less frustrating.
Creating Workspace Lighting Without Special Equipment
Adequate lighting is crucial for a successful repair. Positioning a lamp or using a flashlight can illuminate the workspace, helping you see the components clearly.
Household Items That Substitute for Plumbing Tools
In the absence of specialized plumbing tools, household items can serve as effective substitutes.
Using Towels and Cloths Strategically
Towels and cloths can be used to grip slippery parts or to clean up spills. Wrapping a cloth around a pipe or fitting can provide a better grip when turning.
Improvised Drain Covers
A simple strainer or a piece of cloth can be used to cover the drain, preventing small parts from falling in.
| Household Item | Plumbing Tool Substitute | Usage |
|---|---|---|
| Towel/Cloth | Grip enhancer | Gripping slippery parts |
| Duct Tape | Temporary fix | Sealing minor leaks |
| Rubber Band | O-ring substitute | Creating a temporary seal |
How to Fix a Leaking Faucet Without Tools: Emergency Methods
Fixing a leaking faucet doesn’t always require a trip to the hardware store or a toolbox; here are some emergency fixes you can try at home. When faced with a dripping faucet, it’s essential to act quickly to prevent water waste and potential damage. The following methods can help you temporarily stop or reduce the leak until you can get professional help.
Hand-Tightening Loose Connections
One of the simplest ways to stop a leak is by hand-tightening loose connections. Check your faucet for any visible loose parts and try tightening them by hand. Be careful not to overtighten, as this can damage the faucet’s components.
Using Rubber Bands for Extra Grip
If the leak is coming from a worn-out or loose O-ring, you can try using rubber bands to create a tighter seal. Wrap a rubber band around the affected area a few times to see if it stops the leak. This is a temporary solution but can be effective in an emergency.
Applying Household Sealants as Temporary Fixes
Some household items, like plumber’s tape or silicone sealant, can be used to temporarily fix a leaking faucet. Applying a small amount of sealant around the leaking area can help stop the drip. However, be aware that this is not a permanent solution and may require reapplication.
Adjusting Water Pressure to Minimize Leaking
Sometimes, the leak can be minimized by adjusting the water pressure. This method requires caution to avoid causing further damage.
Safe Pressure Adjustment Techniques
To adjust the water pressure safely, first locate your home’s main water shut-off valves. You can then try to adjust the pressure by tweaking these valves. It’s crucial to make small adjustments and check the faucet’s leak status after each change.
When Pressure Isn’t the Problem
If adjusting the water pressure doesn’t stop the leak, it’s likely that the issue lies within the faucet itself. In such cases, the methods mentioned earlier, like hand-tightening or using rubber bands, might be more effective.
By trying out these emergency methods, you can potentially save water and avoid the hassle of dealing with a more significant leak. However, keep in mind that these are temporary solutions, and consulting a professional plumber is recommended for a permanent fix.
Compression Faucet Quick Fixes Without Disassembly
If you’re tired of the constant drip from your compression faucet, there are a few methods you can try to fix it without taking it apart. Compression faucets, known for their two-handle design, can be a bit tricky to repair, but there are some simple adjustments you can make to stop the leak.
Tightening Handle Connections by Hand
One of the simplest ways to fix a leaking compression faucet is by tightening the handle connections manually. Over time, the handles can become loose, causing the faucet to drip. To tighten, simply grasp the handle firmly and turn it clockwise until it’s snug. Be careful not to overtighten, as this can damage the faucet.
Using Coins as Makeshift Screwdrivers
In some cases, you might need to tighten or loosen a small screw to stop the leak. If you don’t have a screwdriver, a coin can be used as a makeshift tool. Insert the edge of the coin into the screw head and turn it. This can be a bit tricky, so be patient and gentle to avoid stripping the screw.
Applying Gentle Pressure to Realign Components
Sometimes, the leak is due to misaligned components within the faucet. You can try applying gentle pressure to realign these parts. This should be done carefully to avoid causing further damage.
Direction-Specific Adjustments
When applying pressure, it’s essential to do so in the correct direction. For compression faucets, this often means adjusting the stem or the handle in a specific way to ensure proper alignment. Check your faucet’s manual or manufacturer’s instructions for guidance on the correct direction for adjustments.
Testing After Each Adjustment
After making any adjustments, it’s crucial to test the faucet to see if the leak has stopped. Turn on the water and check the faucet carefully. If the leak persists, you may need to try another adjustment or method.
Here’s a summary of the quick fixes for a compression faucet leak:
| Method | Description | Effectiveness |
|---|---|---|
| Tightening Handle Connections | Manually tighten the handle to stop leaks | High |
| Using Coins | Use a coin as a makeshift screwdriver | Moderate |
| Gentle Pressure Adjustments | Apply gentle pressure to realign components | Moderate |

By trying these methods, you can potentially fix your compression faucet leak without having to disassemble it. Remember to be patient and gentle when making adjustments to avoid causing further damage.
Ball-Type Faucet Emergency Repair Methods
Leaks in ball-type faucets are not just annoying; they can lead to significant water waste if not addressed promptly. Ball-type faucets, with their single-handle operation, rely on a ball assembly to control water flow. When leaks occur, it’s often due to issues within this assembly.
Adjusting the Handle Position to Stop Drips
One of the simplest emergency repair methods for a leaking ball-type faucet is adjusting the handle position. Sometimes, the leak can be stopped by simply repositioning the handle. This can realign the internal components and improve the seal.
To adjust the handle:
- Turn off the water supply to the faucet.
- Gently move the handle to different positions to see if the leak stops.
- If the leak ceases, you’ve successfully identified and temporarily fixed the issue.
Using Household Rubber Items for Better Seals
Household rubber items can be repurposed to improve the seal within a leaking ball-type faucet. For instance, a rubber band or a small piece of rubber can be used to enhance the sealing around the ball assembly.
To use a rubber item:
- Identify a suitable rubber item that can fit around the problematic area.
- Place the rubber item around the area, ensuring it’s not too tight or too loose.
- Test the faucet to see if the leak has stopped or reduced.
Improvised Methods to Secure the Ball Assembly
Securing the ball assembly is crucial in stopping leaks from ball-type faucets. There are a couple of improvised methods to achieve this.
Hand Pressure Techniques
Applying gentle hand pressure to the ball assembly or its surrounding areas can sometimes stop the leak. This method requires care to avoid applying too much pressure, which could damage the faucet.
When to Stop Attempting Adjustments
It’s essential to know when to stop attempting DIY repairs. If the leak persists despite trying the above methods, or if you notice signs of wear that require professional attention, it’s time to seek help.
Here’s a summary of the emergency repair methods for ball-type faucets:
| Method | Description | Effectiveness |
|---|---|---|
| Adjusting Handle Position | Repositioning the handle to stop the leak | High |
| Using Rubber Items | Enhancing the seal with household rubber | Medium |
| Securing Ball Assembly | Applying hand pressure or improvising to secure the assembly | Medium to High |
Cartridge Faucet Leak Solutions Using Common Items
A leaking cartridge faucet can be a nuisance, but there are several DIY methods to fix it without calling a plumber. Cartridge faucets are known for their smooth operation, but when leaks occur, it’s often due to misaligned or worn-out cartridges.
Realigning the Cartridge Without Removal
One of the simplest methods to fix a leaking cartridge faucet is by realigning the cartridge without removing it. This can be achieved by adjusting the handle to its correct position, ensuring that the cartridge is properly aligned. Handle adjustments can sometimes resolve the issue by repositioning the internal components correctly.
Applying Even Pressure to Reseat Components
Applying even pressure to the cartridge or its surrounding components can help reseat them properly, stopping the leak. This method involves gently pressing on the relevant parts to ensure they are correctly positioned. It’s a delicate process that requires patience but can be effective.
Using Plastic Cards as Alignment Tools
A creative solution to realigning the cartridge involves using plastic cards. By inserting a plastic card into the gap between the cartridge and its housing, you can gently pry the cartridge into its correct position. This method is particularly useful when the cartridge is slightly misaligned.
Handle Position Adjustments
Adjusting the handle position can significantly impact the faucet’s performance. By tweaking the handle’s alignment, you can sometimes stop the leak. It’s essential to make these adjustments carefully to avoid causing further damage.
Testing Water Flow After Adjustments
After making adjustments, it’s crucial to test the water flow to ensure the leak has been fixed. Turn on the faucet and check for any drips or leaks. If the leak persists, further adjustments may be necessary.
By using these common items and methods, you can often fix a leaking cartridge faucet without needing specialized tools. Remember to always turn off the water supply before attempting any repairs.
Ceramic Disk Faucet Temporary Fixes
A leaking ceramic disk faucet can be frustrating, but there are DIY methods to temporarily stop the leak. Ceramic disk faucets are known for their smooth operation and durability, but like any other faucet type, they can develop issues over time.

Gentle Cleaning Methods Without Disassembly
One of the simplest methods to temporarily fix a leaking ceramic disk faucet is by gently cleaning the faucet without disassembling it. Dirt and mineral deposits can cause leaks, and cleaning can sometimes resolve the issue. Use a soft cloth to wipe down the faucet, paying particular attention to the areas around the handle and the spout.
Using Vinegar-Soaked Cloths Around Connections
For faucets with mineral buildup, using vinegar-soaked cloths around the connections can help dissolve the deposits. Soak a cloth in white vinegar, wrap it around the leaking area, and let it sit for a few hours or overnight. The acid in the vinegar can help break down mineral deposits, potentially stopping the leak.
Careful Handle Adjustments to Improve Sealing
Sometimes, adjusting the handle can improve the sealing and stop the leak. It’s crucial to make these adjustments carefully to avoid causing further damage.
Identifying Safe Adjustment Points
Before making any adjustments, identify the safe adjustment points on your faucet. This usually involves looking for small screws or mechanisms that can be adjusted by hand or with a simple tool.
When to Avoid Further DIY Attempts
If you notice that the leak persists or worsens after attempting these temporary fixes, it’s a sign that you should avoid further DIY attempts. Continuing to try to fix the faucet yourself could lead to more significant problems, including water damage or the need for more extensive repairs.
As “a stitch in time saves nine,” addressing faucet leaks promptly can prevent more significant issues down the line. If you’re not comfortable with these temporary fixes or if they don’t resolve the issue, it’s time to consider seeking professional help.
Natural Remedies to Stop Faucet Leaks Temporarily
For those unexpected faucet leaks, there are some natural remedies that can provide a temporary solution. These household items can help you manage the leak until you can get the proper tools or call a professional.
Vinegar Solutions for Dissolving Mineral Deposits
Vinegar is a versatile household item that can help clear mineral deposits causing faucet leaks. Soak a cloth in vinegar and wrap it around the faucet’s aerator or other affected areas. The acid in the vinegar helps dissolve mineral buildup, potentially reducing or stopping the leak.
Baking Soda Pastes for Minor Crack Sealing
Baking soda mixed with water to form a paste can be used to seal minor cracks. Apply the paste to the affected area and let it dry. This method can provide a temporary fix until a more permanent solution is applied.
Food-Grade Oils as Temporary Lubricants
Some food-grade oils can be used to lubricate faucet parts temporarily. Apply a small amount to the O-rings or other moving parts to reduce friction and potentially stop the leak.
Coffee Grounds for Emergency Sealing
In an emergency, coffee grounds can be used to temporarily seal small leaks. Pour the coffee grounds into the leak, and they might swell enough to stop or reduce the leak.
Application Methods
For vinegar and baking soda, application involves either soaking or applying a paste directly to the leak source. For oils and coffee grounds, it’s about applying a small amount directly to the affected area.
Duration of Effectiveness
The duration these remedies are effective can vary. Vinegar and baking soda pastes might last longer than coffee grounds or oils, but all are considered temporary fixes.
When to Stop DIY Attempts and Seek Professional Help
Knowing when to call it quits on DIY repairs and seek professional assistance is vital to preventing further damage.
While attempting to fix a leaking faucet on your own can be a cost-effective and rewarding experience, there are situations where the expertise of a professional plumber is necessary.
Signs of Worsening Leaks Despite Interventions
If you’ve tried the suggested DIY fixes but the leak persists or worsens, it’s a clear indication that the issue is more complex than initially thought. Continuing to ignore the problem or attempting to fix it without proper knowledge can lead to significant water damage and increased utility bills.
Water Pressure or Temperature Changes
Noticing changes in water pressure or temperature can be a sign of a more serious underlying issue that requires professional attention. Fluctuations in water pressure can indicate problems with the plumbing system, while temperature changes might suggest issues with the water heater or mixing valves.
Unusual Sounds From the Faucet or Pipes
Unusual sounds, such as banging, clanking, or gurgling noises coming from the faucet or pipes, can signal a variety of problems, including loose parts, mineral buildup, or even air in the pipes. Ignoring these sounds can lead to more severe issues, such as pipe bursts or further damage to the faucet.
Finding Emergency Plumbing Assistance
When faced with a plumbing emergency, it’s essential to find a reliable and prompt plumber. You can start by asking friends or family for recommendations or checking online reviews to find a trusted professional in your area.
Questions to Ask When Calling a Plumber
Before hiring a plumber, it’s a good idea to ask a few questions to ensure you’re getting the right service. These might include inquiries about their experience with similar issues, their availability for emergency calls, and their pricing structure.
Temporary Containment Until Help Arrives
While waiting for professional help to arrive, there are a few steps you can take to temporarily contain the issue. Turning off the main water supply valve can prevent further damage, and using buckets or towels to catch any remaining drips can help minimize the mess.
Preventing Future Leaks With Regular Maintenance
By incorporating simple maintenance habits, you can significantly reduce the likelihood of faucet leaks. Regular upkeep not only extends the life of your faucet but also helps in avoiding the inconvenience and potential water damage caused by leaks.
Monthly Inspection Routines Without Tools
Conducting monthly inspections is a straightforward way to identify potential issues before they become major problems. Check for signs of wear around the faucet’s handle and spout, and ensure all connections are secure. This simple routine can help you catch issues early, making repairs easier and less costly.
Gentle Cleaning to Prevent Mineral Buildup
Mineral buildup from hard water can lead to faucet leaks over time. Gentle cleaning with a soft cloth and mild soap can help prevent this. Avoid using harsh chemicals or abrasive materials that can damage the faucet’s finish or harm its internal components.
Proper Daily Usage Habits That Extend Faucet Life
Simple daily habits can significantly impact your faucet’s longevity. Avoid turning the handle too tightly, as this can wear out the faucet’s internal parts faster. Also, be mindful of the water temperature; extreme temperatures can affect the faucet’s performance and longevity.
Seasonal Maintenance Considerations
Different seasons bring different challenges for your faucet.
Winter Precautions
In colder months, ensure that your faucet is protected from freezing temperatures, which can cause pipes to burst.
Summer Water Conservation
During summer, being mindful of your water usage not only helps in conserving this precious resource but also reduces the strain on your faucet, potentially preventing leaks.
By following these simple maintenance tips, you can enjoy a leak-free faucet for years to come, saving water and reducing the need for costly repairs.
Conclusion
Addressing a leaking faucet promptly is crucial to prevent water damage and increased water bills. By understanding the type of faucet you have and the common causes of leaks, you can attempt DIY faucet repair with confidence.
Regular faucet maintenance is key to extending the life of your faucet. Simple tasks like inspecting your faucet monthly, cleaning mineral buildup, and adopting proper daily usage habits can make a significant difference.
By applying the DIY repair methods and maintenance tips outlined in this article, you can fix a leaking faucet without tools and prevent future leaks. Whether you’re dealing with a compression, ball-type, cartridge, or ceramic disk faucet, taking proactive steps towards fixing leaking faucet issues will save you money and reduce waste.
With these easy-to-follow DIY faucet repair and faucet maintenance tips, you’re empowered to take control of your faucet’s health. Don’t let a small leak become a bigger problem – take action today and enjoy the benefits of a well-maintained faucet.